I bought 6 yards of red gingham sometime back because my husband wanted a red gingham button down shirt with wooden buttons. So I decided to make matching family outfits again.

For my husband – Fairfield shirt (Thread Theory)

I used the Fairfield pattern by Thread Theory. Unfortunately, it didn’t turn out too well because I didn’t measure the sleeve length before making the plackets and the sleeves came out way too long.
I made a Fairfield shirt before and cut off several inches from the sleeves of the shirt – but forgot to cut off from the pattern itself. So when I made the new shirt, I thought the pattern was already adjusted and didn’t bother to double check. Also, I sewed the button hole on different sides of the cuff and placket.
I had to cut off my lovely tower plackets that I took an hour or so to make because I didn’t have time or enough fabric to unpick the sleeves and make new ones. I may have cut too short and will probably add cuffs.
Another minor issue I have with the shirt is that the interfacing I used for the collar is a bit too stiff – and I interfaced both sides of the collar. I think it would have been better if I just interfaced one side. I don’t want to unpick and re-do the collar so I’m leaving it as it is for now.
Do I like this pattern? I don’t know. The fit looks okay but the instructions are not that easy for me to get – and I’d consider myself an intermediate sewist. The sewalong helps but it would have been great if the instructions itself would have sufficed for me to follow along. Also, the part where the seam allowances don’t match up (for the flat-felled seams) just wasn’t intuitive for me. I prefer sewing at 1/2″ seam allowance, cutting one of the seams to 1/4″ then folding it in to sew.
For myself – Meadow Skirt (Twig+Tale)
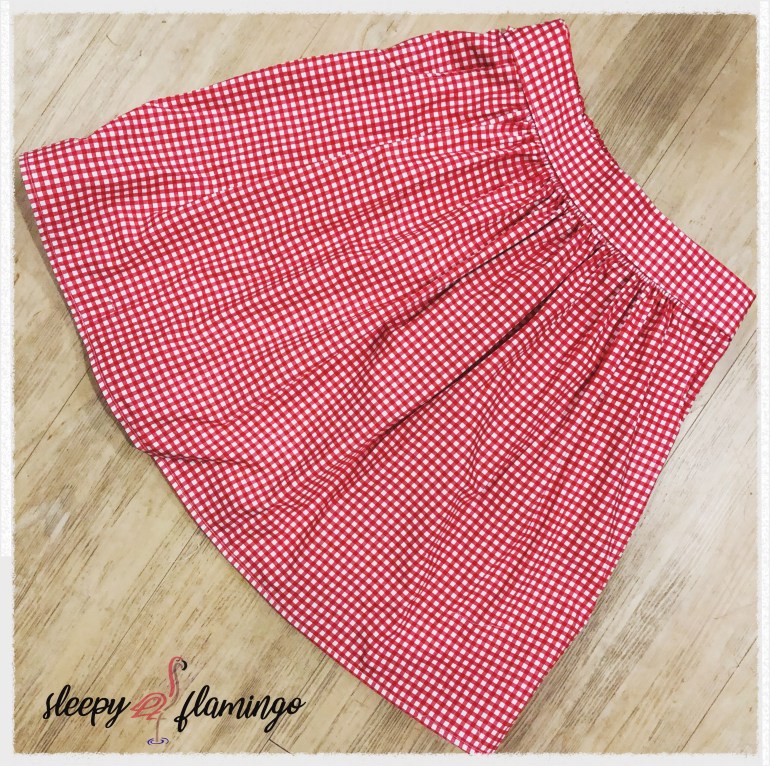
I’ve had my eye on Twig+Tale’s Meadow skirt from the time it was released but kept trying to resist. I thought it was just a basic gathered skirt – which I’ve made for myself without any pattern. What finally swayed me is that the self-drafted skirts I made never seemed flattering on me, so I decided to just go for it.
I was very happy I did because the instructions were great. The waistband seemed a bit too thick for my liking, but looking at the pictures, I think it looks good. I also love the deep pockets and the sash at the back.
It was a very easy sew until the part where you attach the waistband to the skirt. That made me stop because instead of sewing the right sides together, like I was used to, the instructions say to sew the right side of the waistband to the wrong side of the skirt. It was a different method – but very effective! The top stitching was a lot more straight as a result and I didn’t have to worry about catching anything at the back.
I put horsehair braid at the hem to make it slightly poofier. One thing I might change next time – I might do a full belt sash instead of a sash that you can tie either at the front or at the back. I like how the sash looks tied in front, but I also like how the sash covers the gathered waist at the back. A full belt sash that covers the back and I can tie in front should solve that.
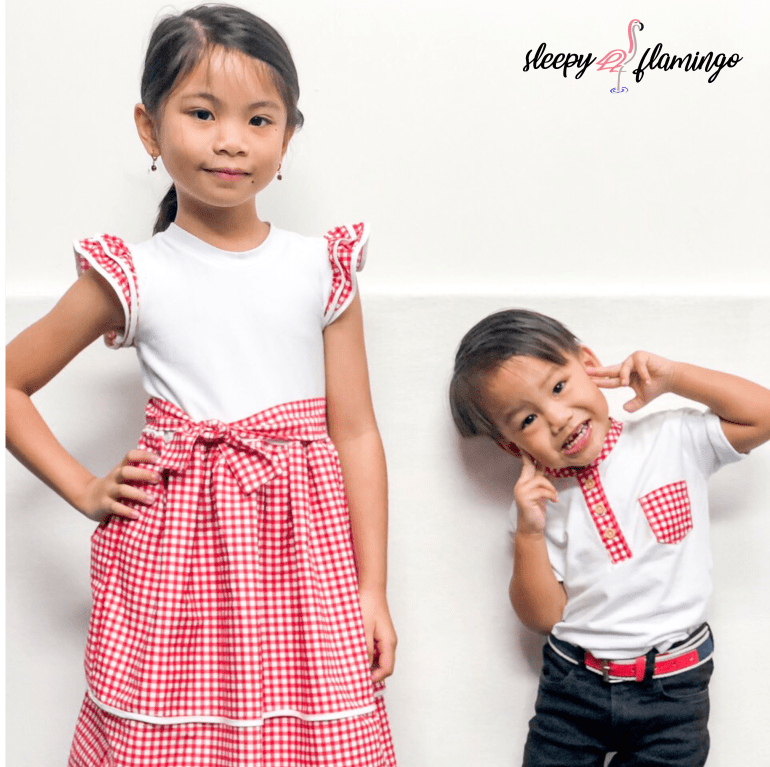
For my daughter – Quinn Dress by Ellie and Mac
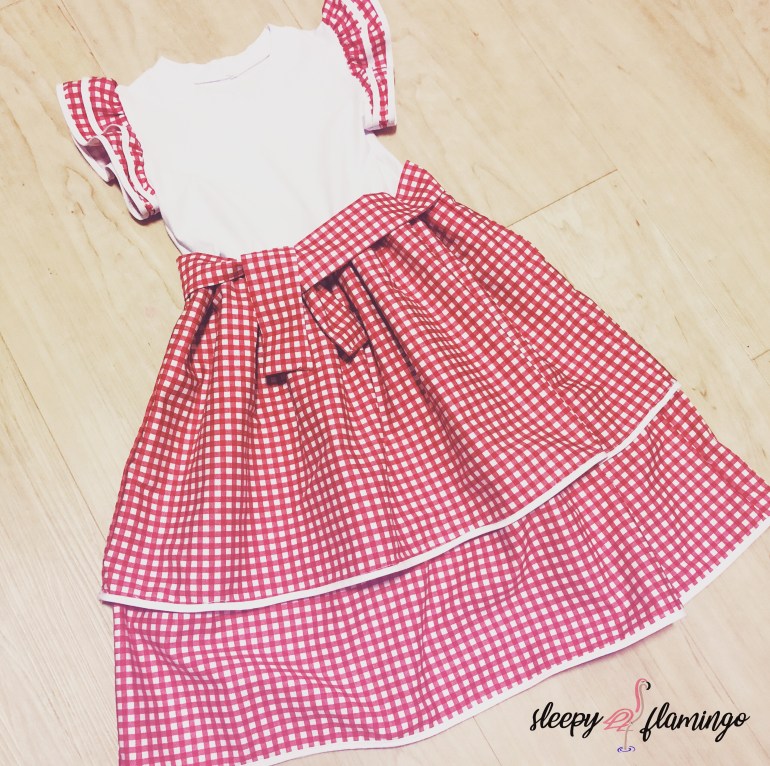
I took the longest time trying to decide what to make for my daughter. The easiest would have been to self-draft a basic A-line dress with no waist seams. But in the end I decided to use a pattern I bought many months ago – the Quinn dress by Ellie and Mac (affiliate link). I’ve done patterns by this designer before and I knew it would be a quick, satisfying sew with easy to follow instructions. I worked on it on Saturday late night, planning to wear it to church the next morning.
The only problem – my serger decided it was time to mess with me. I re-threaded at least five times, adjusted one knob after another, and almost completely gave up. Once I got the machine up and running, it came together quickly. The only thing that took a while was putting bias tape on all the hems of the gingham.
The result was a very dainty dress that is probably one of my favorite sews of all time. I ran out of fabric though and had to shorten the sashes by a lot.
For my son – Pocket Henley by Ellie and Mac

I love how henleys look but was always a little hesitant to sew one. I got this pattern during the weekly Wacky Wednesday sale (where 6 patterns sell for one dollar each) and was excited to finally try it out.
The neckband should be something stretchy, so I was originally planning to use white knit for the neckband and just have a red gingham pocket. In the end I decided to cut the neckband from the woven gingham in the bias and see if that works. It does! Since the henley has a front placket, you can just open up the buttons so that you won’t need the neckline to be too stretchy.
I’m pretty pleased with how this entire family matching outfit turned out, and can’t wait to make more.